|
#121
 Sat 28 April 2012, 22:43
|
|||
|
|||
|
Dropbox may not allow linking?
What kind of glue are you using and how are you clamping the spoilboard down during the glue up? Im thinking it may not enough clamping during the glue cure time. Last edited by domino11; Sat 28 April 2012 at 22:46.. 
|
|
#122
Sun 29 April 2012, 00:58
|
|||
|
|||
|
i'm using liquid nails, and I clamped it on overnight on the corners.
|
|
#123
Sun 29 April 2012, 05:16
|
|||
|
|||
|
John,
I have seen this before. The real challenge is the fact that liquid nail is not a great adhesion for MDF - and an elastic bond. Ideally, when you bond the spoil board layers, you should have a very even, 100% coverage layer of non-elastic glue. Titebond, Elmers Wood glue, even White Glue by the Gallon works perfectly. Sadly, liquid nail doesn't allow for great coverage even if you screed it out to a thin layer. For me personally, I use a very heavy NAP paint roller and spread out a 50/50 mixture for wood glue and white glue. Place the top spoil board on the bottom spoil board and then load about 8 sheets of plywood on top, and whatever weight I have in shop - and leave for 2 days. Then surface. I haven't had edge curl. For you, in order to get some life out of the spoil board that you have - you may have to mechanically fasten the top down with screws. Counter sink them and know that you have about a 1/4" of surfacing before you hit them. Good luck
|
|
#124
Sun 29 April 2012, 06:13
|
|||
|
|||
|
for using dropbox, place your files in PUBLIC folder and you get a right click options to copy the public link so you can post it here, but it cant show direct pictures I think
|
|
#125
Sun 29 April 2012, 06:38
|
|||
|
|||
|
You can screw down while the glue sets and then take the screws out again.
|
|
#126
Sun 29 April 2012, 08:17
|
|||
|
|||
|
...and I use screws. Thanks Gerald
|
|
#127
Sun 29 April 2012, 16:21
|
|||
|
|||
|
many thanks guys, I'll see if I can try taking it off one more time and get some different glue. I'll let you know the results.
|
|
#128
Sun 29 April 2012, 20:57
|
|||
|
|||
|
I place weights (fashioned by buckets of water) over the spoil board.
|
|
#129
Sat 05 May 2012, 02:44
|
|||
|
|||
|
i read on woodweb that to make the same pressure as a press using stacked sheet goods it is something like 1000 sheets ontop of each other,
screws are by far the simplest way.
|
|
#130
Wed 18 July 2012, 01:13
|
|||
|
|||
|
hey guys here's a couple more things I've made recently, nothing too complex, just a simple family sign which i took before it was complete. The family I gave it too colored in the lettering to make it stand out a little more, I'll try and find a picture of it hanging up.
The second sign I did for a buddy who own a business, this took a couple tries to get right. My first attempt was to route it all out of a single piece and then paint it. This didn't turn out so well since my spoilboard was lifting up and created a pocket in the bottom left, and also, I couldn't figure out how to paint it  I reattempted it by doing pockets and inserts, but this took a couple tries as well, as my lettering kept getting messed up because I had a loose grubscrew on a pinion, took a while to figure it out, but a little locktight later, I was good to go. The letters were a tight fight, but a hammer and a steel block to press them in provided good persuasion I reattempted it by doing pockets and inserts, but this took a couple tries as well, as my lettering kept getting messed up because I had a loose grubscrew on a pinion, took a while to figure it out, but a little locktight later, I was good to go. The letters were a tight fight, but a hammer and a steel block to press them in provided good persuasion  Currently, my spoilboard came up soo far as too be unusable, so as soon as I have access to a truck, it is coming off and a new one is going down, this time being done properly. Other current projects in the works is an arcade cabinet like the one I think... Brad? did? and a box for my mother with engraving on it. Hopefully more pictures for those soon.  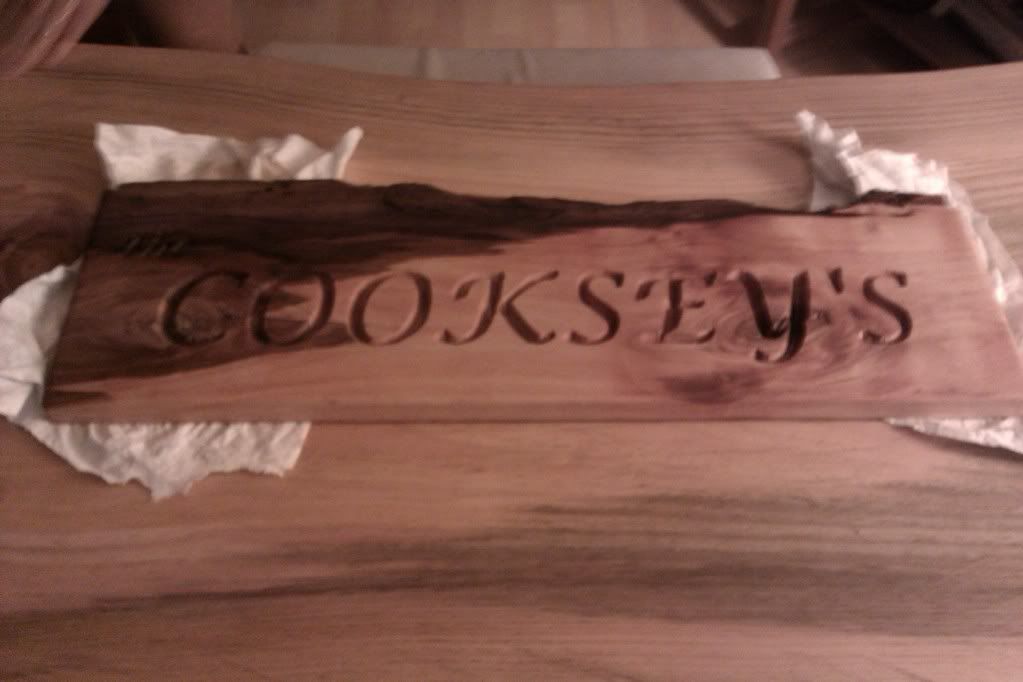 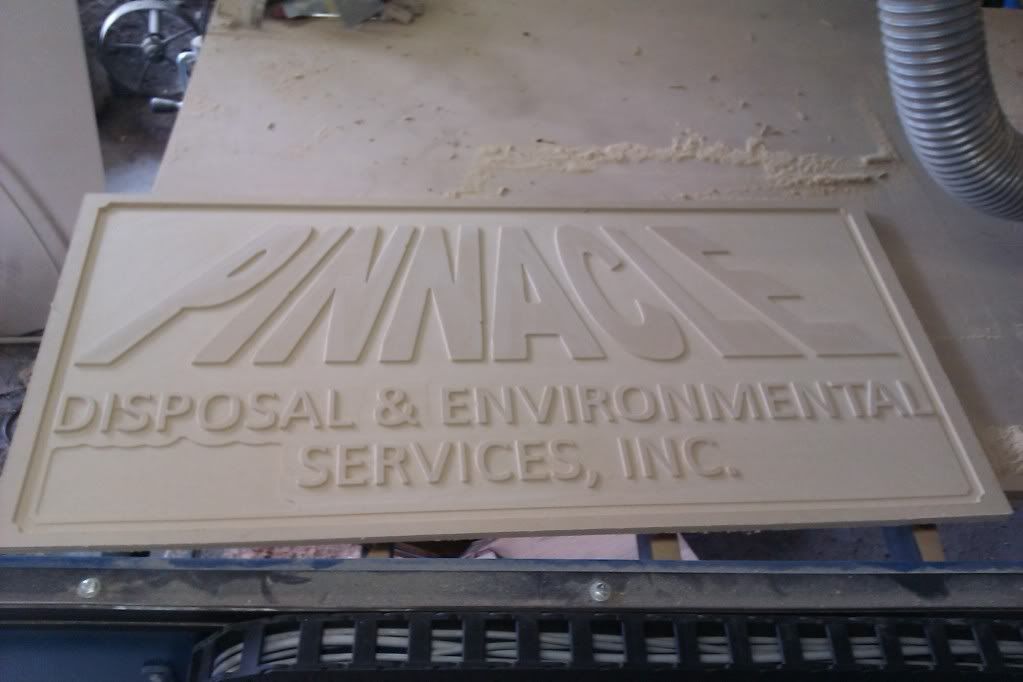 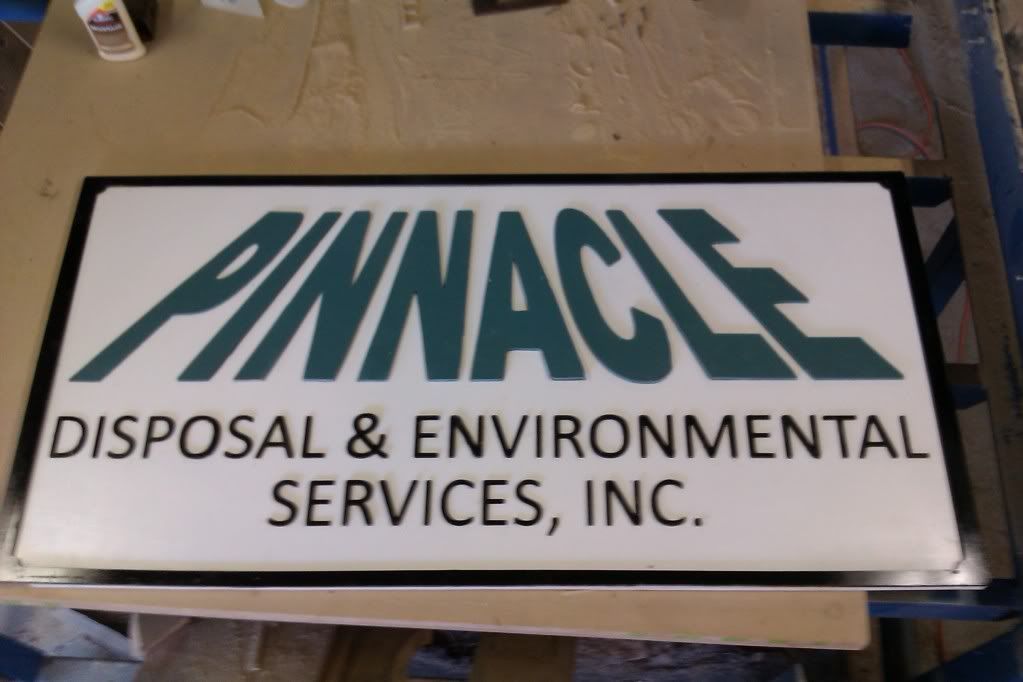
|
|
#131
Wed 18 July 2012, 05:35
|
|||
|
|||
|
Very nice work, John.
|
|
#132
Fri 28 March 2014, 13:43
|
|||
|
|||
|
Long time no update, but been doing some random things. I've gotten into wood planing for a couple of guys and that seems to be somewhat profitable. I just finished a 3 inch slab of redwood measuring 44 X 118 inches. It was a big boy! took about an hour and 15 minutes to plane it flat, took off about 1/8 inch off the top.
|
|
#133
Fri 28 March 2014, 19:46
|
|||
|
|||
|
Cool!!
|
|
#134
Sat 29 March 2014, 20:54
|
|||
|
|||
|
Was that redwood harvested legally? Ha, ha

|
|
#135
Fri 11 October 2019, 12:54
|
|||
|
|||
|
Hey all,
I've been fairly quiet for awhile as I fell off the mechmate wagon. I'm getting back on it and getting the machine back in order. A few things on my list to do 1) add the estops and boxes to the gantry and carriage 2) Add the endstops with prox switches to the gantry and carriage 3) Add SSRs to my dust collector and router 3) fine tune the base to check for level 4) Add my ATC spindle and add ATC to machine (thinking a wine rack at the end), this is a long term project 5) add gearing to get away from direct drive 6) machine a new dust shoe I've been using my machine to cut a few orders in the last couple of weeks and I have been spending more time fixing it up than cutting. Just today I went to cut a part, and realized I forgot to pocket an area, no big deal right? I'll just go back into vcarve and add the pocket. Well went it went to cut my machine decided it wanted to go a half inch to the left for some reason and ruined the part! I either lost steps or had a mechanical malfunction, I'm not sure which as it happened twice with two different operations. I have a few questions that would go under different categories so I figured I'd post them in my build thread 1) Can someone with direct drive share their mach 4 motor tuning settings? I want to see if I'm at least in the ballpark of other people. I know each person is going to be individually different, but for what it's worth I have 20 teeth and 20 pitch pinions which should be pretty common on our machines. 2) Any ideas mechanically what can cause that kind of jump I described above? springs not tight enough (although they feel super tight still)? 3) for those running a router off the pmdx-126, what kind of SSR did you use? I am running a 3.5 hp Milwaukee 5625, if anyone has something similar. 4) same above for the dust collector, just running the cheap 2 hp harbor freight one. Thanks all for being a helpful community, I'll post what I've been cutting soon!
|
|
#136
Fri 11 October 2019, 19:24
|
|||
|
|||
|
Hi John.
It sounds as if you have your work cut out for you. Misposition, good old fashioned operator error? Always a factor. I cannot help much but here are the settings I used for Mach 3. X steps 22.143, Velocity 6000mm/min, Acceleration 250. Y as above. Z 22.143, 2500, 150. My machine is metric and is smaller and slower than most. It probably could go faster but I do not feel the need. I no longer use Mach. I changed to Linux EMC, a far superior animal. Hope it helps.
|
|
#137
Sat 12 October 2019, 15:58
|
|||
|
|||
|
I hope it wasn't user error, All I did was restart the G code, I know I didn't reset any axis's. Looking at the part it looks like it was just in the gantry axis, I'll have to ponder on that one.
Thanks for the other settings, were you doing direct drive? I'll convert and see if I'm the ball park.
|
|
#138
Sat 12 October 2019, 18:01
|
|||
|
|||
|
Yes, it is direct drive.
I did try a reduction drive on the Z but I could not get it to work reliably.
|
 |
|
|
 Similar Threads
|
||||
| Thread | Thread Starter | Forum | Replies | Last Post |
| Cutting Some Signs! #95 - Mystic, CT | alan254 | MechMates already cutting | 109 | Wed 21 December 2022 06:07 |
| Small Redwood Signs! | Jayson | The Show Room | 3 | Sun 09 August 2009 22:46 |
| Fridge magnets and Signs | Jayson | The Show Room | 0 | Sat 13 June 2009 04:51 |
| How to do Signs Lessons | sailfl | Miscellaneous / General / Whatever / Catchall | 10 | Fri 06 February 2009 04:03 |
| Commercial Signs | Hugo Carradini | The Show Room | 17 | Wed 21 January 2009 22:51 |


