|
#721
 Sat 07 June 2014, 07:05
|
|||
|
|||
|
Hi Pete
Just checked back to the MM site and you have been doing some really great precision work. You are making me feel lazy esp with the dust collection  . .Regards Ross 
|
|
#722
Sat 07 June 2014, 07:11
|
|||
|
|||
|
Ross, if it was not for your assistance I would not be where I am as of today. So the credit is shared, friend, and thank you for the compliment.
|
|
#723
Sun 08 June 2014, 15:51
|
|||
|
|||
|
Getting ready to cut out material required for a spare touch probe.
Have been looking at making one of these also. Spring loaded plotter pen
|
|
#724
Sun 08 June 2014, 17:38
|
|||
|
|||
|
Very interesting, Pete. Keep us informed on the plotter pen, will ya?
|
|
#725
Mon 09 June 2014, 21:10
|
|||
|
|||
|
New SS touch probe. This one I opted for all stainless steel. Took a while to find all the pieces at a reasonable price. My aim with this one is to resist rusting. I have used the other one quite a bit since it was made. I bought enough components to make 2 originally with the hopes if it worked well to make a backup.
 Cutting out Bearing Spacer 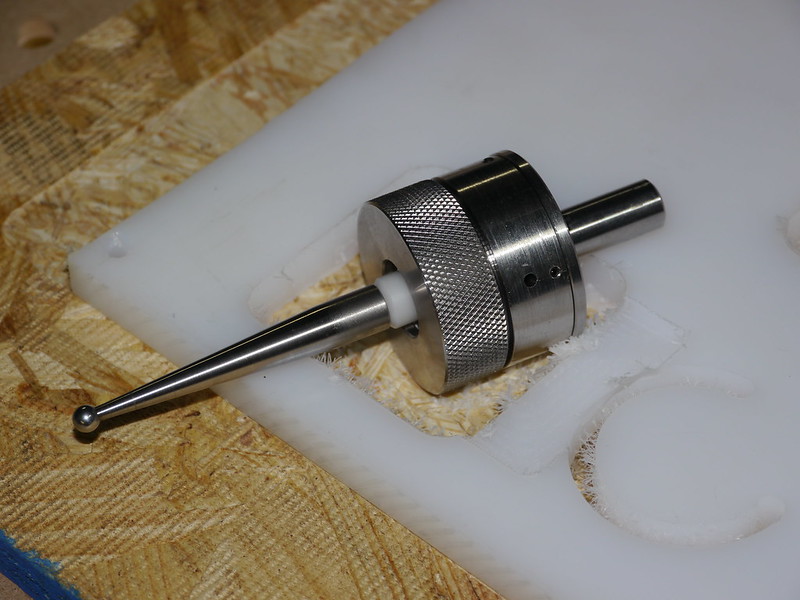 Partially Complete
|
|
#726
Thu 12 June 2014, 05:05
|
|||
|
|||
|
Pete #98. Sorry for getting off topic but I was reading one of your post from two years ago (June 2012) and was hoping you would share your experience with the set screws you used to level your X beams. I am at that stage and my X beams are a bit higher on the inside then the outside. The set screw sounds like the perfect answer to this C channel problem but I was wondering how it's worked for you over the long term? Have they moved on you? Did you use locktite or something similar to hold them in place? Any advice would be appreciated.
John
|
|
#727
Thu 12 June 2014, 12:27
|
|||
|
|||
|
John, the set screws have not moved that I have noticed. You said "to level your X beams", I used it to correct the X rails and not the main beam. So the rest of this I will apply to what I did on correcting the X rail tilt. My main beam was welded to the legs and the crossbearers are bolted to them. I did not want to interfere with the mating surface of the bottom of the main beam to the crossbearer so I elected to correct the problem on the top of the main beam by jacking the rail into the correct position. The forces are also less at the rail as compared to the bottom of the main beam. I did lose some Y travel since my C channel was bent in but I designed a little oversized so it did not hurt it in the end. I originally was going to Loctite the screws but did not in case I had to move them later. Anything under 1/4" and Loctite 242 and 290 is considered permanent. With the draw down from the hold down bolts on the rails it locks the set screw threads down rather well. If you use set screws to level out the rail, the thickness of the rail would be the maximum size of the set screw to use to get maximum holding power out of the thread. I also would recommend if you are using standard thread and not metric to use fine thread to increase the amount of load the threads can bare. In my case, the distance left from the head of the bolt to the edge of the rail dictated the size of the set screw which became a M5. If you are using the set screws to level the beam, I cannot say if they will work their cup point into the steel over time from dynamic forces or not. I hope this helps.
|
|
#728
Fri 13 June 2014, 10:59
|
|||
|
|||
|
Buy the right set screws, they come with points flats reverse cones nylon tips balls etc. buy some flat ones ( or grind the tip )
Loctite could (imo should) be used, ( use a thread locker like 243 not a glue like 603 ) and when you need to get them out, just use a pencil torch on the setscrew for short while, anything over 100 degrees will kill the loctite bond and allows for removal. Even 603 joints can be released this way ( but need more heat ) Don't use the lately popular ball nose hex keys when you remove them, use good old fashioned straight tipped ones, as you will strip the heads easily with the ball, they are only intended for turning in an angle before you actually tighten bolts down. Last edited by Fox; Fri 13 June 2014 at 11:01..
|
|
#729
Fri 13 June 2014, 11:02
|
|||
|
|||
|
Quote:
|
|
#730
Fri 13 June 2014, 18:34
|
|||
|
|||
|
Fox,
The original is working great. I cannot complain even a bit. For an example, I had to clean up the V carve on the goat sign (midway through the painting process). I set up the location in the original orientation for cutting. Used it to touch off the surface and off the other touch probe for tooling to find my offset. Used 5 distinct points to touch off to rotate the round sign back to the original XY datam. Worked like a charm. Without it, that would have been almost impossible. Now, is it a Renishaw or equivilant, No. But the DRO always stops at the exact same point when touching off from the side and for wood, I feel that is more than accurate enough.
|
|
#731
Mon 23 June 2014, 19:39
|
|||
|
|||
|
Finally got my Frame World EX-2 aluminum for the bedway to mount the tailstock on. They are the length of the MechMate bed. Now I need to calculate out the C3x5 I need to buy to modify the cross bearers. Still have not worked out the removable section of the spoilboard yet. I have a shed to finish if the rain would ever quit.
|
|
#732
Mon 11 August 2014, 16:09
|
|||
|
|||
|
Starting early.
|
|
#733
Mon 11 August 2014, 21:01
|
|||
|
|||
|
Cool.
|
|
#734
Tue 12 August 2014, 05:19
|
|||
|
|||
|
Pete you always amaze me with your knowledge and generosity.
Appreciate what you have contributed to this forum! Keep up the keeping up :-)
|
|
#735
Wed 13 August 2014, 02:49
|
|||
|
|||
|
Quote:

|
|
#736
Wed 13 August 2014, 14:37
|
|||
|
|||
|
Will try
|
|
#737
Wed 20 August 2014, 17:36
|
|||
|
|||
|
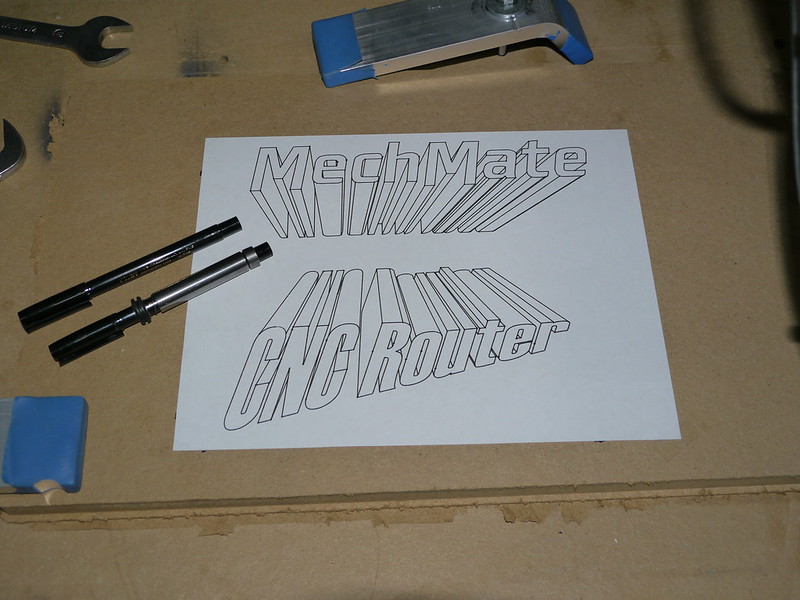
Just finished this up. Based on the post I made earlier
 CNC plotter pen from design found online at instructables.com. , on Flickr
|
|
#738
Thu 21 August 2014, 05:47
|
|||
|
|||
|
Looks good Pete, please let us know how it performs. I bought one of Kyles but have yet to test it out....
|
|
#739
Mon 25 August 2014, 18:46
|
|||
|
|||
|
Bruce,
I will. Just finished my year long shed project so I can now move back to the machine.
|
|
#740
Mon 25 August 2014, 19:10
|
|||
|
|||
|
This is a post about the Gecko 203 Vampire drive and its performance. Where I work at we use industrial AC drivers. I am not found of AC drives of this nature but it is a fairly well known name in industrial applications. Using the drive with their stepper (1100 in oz) controller with the Oriental Motor SCX11 controller, it is used to make adjustments for a process. The driver works great with the only hang up being with lose of power it will fault and takes a 20 sec power off to clear. The maximum turns per sec with the drive around 20 r/m before stalling. We have some machines where they already have a 80 V power supply (67 VDC actual) that the original dc drive is no longer available. So I suggested we try a Gecko drive. We wired it up and tested it with the Oriental Motor controller. The spec sheet for the motor says 50 r/m is capable. With the Gecko, it works fine. Multiple runs of cw and ccw at 50 rev/s without one hiccup. While this has little to do with the Mechmate it does say that the DC powered applications like ours with a Gecko drive will run well and can be pushed hard. It was great to see.
|
|
#741
Sat 30 August 2014, 16:28
|
|||
|
|||
|
|
|
#742
Sat 30 August 2014, 17:46
|
|||
|
|||
|
Looks great Pete...can I assume you give the plotter pen set-up thumbs up?
Mark
|
|
#743
Sat 30 August 2014, 17:50
|
|||
|
|||
|
Yes. It does work well. I was just saying that I can make a large banner with the different color pens. The only down side is they are only available in green, red, blue and black.
|
|
#744
Sat 30 August 2014, 19:01
|
|||
|
|||
|
Yeah, I am sure more colors would be nice. Silly question, do you just install that in the 1/2" collet of your spindle/router?
Mark
|
|
#745
Sat 30 August 2014, 19:51
|
|||
|
|||
|
Yes. It is held in the 1/2" collet. I do use tape to keep the spindle from free spinning.
|
|
#746
Sat 30 August 2014, 19:59
|
|||
|
|||
|
I wonder what mods it would take to be able to use Sharpies? Pretty much unlimited color range
I think this is on my to-do list! Thanks for posting. Mark
|
|
#747
Sat 30 August 2014, 20:03
|
|||
|
|||
|
Sharpies are more tapered. Much more complicated to hold true. I started with the same thought. There is a 0.040" taper on those.
|
|
#748
Sat 30 August 2014, 20:29
|
|||
|
|||
|
Figures, it wouldn't be that easy. Did you by any chance look into other pens/marker brands? That might not be tapered and have more colors? I assume you considered adapting the holder to accommodate the sharpie too? Just thinking out loud...like you said, very nice add on if you could add colors.
Mark
|
|
#749
Sat 30 August 2014, 20:43
|
|||
|
|||
|
Looks like Dick Blick has some markers that are not tapered (looks to be about 1/2" diameter) of course it doesn't say, broad tip on one end and fine tip on the other. 196 colors too?
Will be fun to investigate! Mark
|
|
#750
Sat 30 August 2014, 20:44
|
|||
|
|||
|
I would like the addition of the fine point to use with the ultra fine point.
|
 |
|
|
 Similar Threads
|
||||
| Thread | Thread Starter | Forum | Replies | Last Post |
| Parts arrived !!! Time to get to work !! - Pennsylvania USA | Rapid | Introduce yourself and start planning | 51 | Fri 06 June 2014 07:53 |
| Newbe here - Pennsylvania, USA | Dave | Introduce yourself and start planning | 19 | Wed 11 December 2013 17:30 |
| Sign for my self | danilom | The Show Room | 6 | Fri 04 March 2011 04:50 |
| Hot Rod Shop Sign | woody | The Show Room | 4 | Fri 23 April 2010 12:14 |
| Edge lit sign | Jayson | The Show Room | 4 | Fri 20 March 2009 22:55 |